Linking INSTEON Modules
Linking GarageHawk Modules
Like other INSTEON enabled devices, GarageHawk modules must be linked to each other to function.
Note: If you have purchased a GarageHawk Starter Kit or Pre-Configuration Linking Service, your Garage Module and Remote Module have been linked at the factory and no further linking is required unless you plan to expand your system by adding additional modules.
All GarageHawk settings are stored in non-volatile memory and are not lost during power failures. Additionally, in the event of a power loss,
GarageHawk will automatically reestablish communications and report the current garage door status when power is restored.
Whenever you add or remove any GarageHawk or other INSTEON enabled device from your system, it is strongly recommended that you remove all links from all GarageHawk devices and then re-link all modules according to your needs. Failure to do this may result in performance degradation and/or operational failures.
-
Unlinking GarageHawk Modules
-
Linking Additional Garage Modules
-
Linking GarageHawk Modules
-
Linking Additional Remote Modules
-
Linking to INSTEON Lighting and Appliance Modules
-
Using X10 Modules with GarageHawk
-
GarageHawk Linking Configurations
-
One Garage Door - One Monitoring Location
-
One Garage Door - Multiple Monitoring Locations
-
Multiple Garage Doors - One Monitoring Location
-
Multiple Garage Doors - Multiple Monitoring Locations
Unlinking GarageHawk Modules
- Unplug GarageHawk module for about 10 seconds
- While holding down the Set button on GarageHawk module, plug the unit back in, making sure not to let go of the Set button. Once the unit is plugged in, continue to hold down the Set button for 3 seconds, then release
- The GarageHawk module Status LED will turn on solid bright, and then turn off.
- A few seconds later, the Red Status LED (Garage Module) or Door Position Indicator (Remote Module) will begin to flash the following sequence: two rapid red flashes, pause, repeat. (This sequence indicates no links are present)
- The links have been deleted and the GarageHawk module is now ready to establish new links before use.
- Repeat items 1 through 5 for each GarageHawk module in your system.
Linking GarageHawk Modules
- Plug the Garage Module into a convenient outlet
- Plug the Remote Module into the Garage Module and wait 10 seconds while units reset
- Press & hold the Set button on the Garage Module for 10 seconds and release (Status LED on the side will begin to flash)
- Press & hold the Set button on the Remote Module for 3 seconds (Status LED on the side of the Garage Module will stop flashing. You will have 4 minutes to complete steps 3 and 4 before Linking mode automatically times out.)
- Repeat steps 2 through 4 for each Remote Module in your system.
Linking Additional Garage Modules
If you have multiple Garage Modules in your system
Repeat steps 1 through 5 for each Garage Module in your system.
Linking Additional Remote Modules
If you have multiple Remote Modules in your system, each Remote Module must have a link to each of the other Remote Modules in your system
-
Stack all remote modules together by plugging the 1st Remote Module into a convenient outlet, then plug in additional Remote Modules on top.
- Press & hold the Set button on the 1st Remote Module for 10 seconds, then release (Status LED on the side will begin to flash.). You will have 4 minutes to complete steps 3 and 4 before Linking mode automatically times out.
- Press & hold the Set button on the 2nd Remote Module for 3 seconds (Status LED on the side of the 1st Remote Module will stop flashing. If you have more that two Remote Modules in your system, proceed to step 4.
- Repeat steps 2 through 3 for each additional Remote Modules in your system until you have linked each Remote Module to all other Remote Modules.
Linking to INSTEON Lighting and Appliance Modules
If you wish to enable GarageHawk's Temporary Path Lighting feature using INSTEON Lighting or Appliance Modules.
- Press & hold the Set button on the Garage Module for 10 seconds and release (Status LED on the side will begin to flash.).
- Press & hold the Set button on the Lighting or Appliance Module for 3 seconds (Status LED on the side of the Garage Module will stop flashing. You will have 4 minutes to complete steps 1 and 2 before Linking mode automatically times out.).
- Repeat steps 1 through 2 for each Lighting or Appliance Module in your system.
- Repeat steps 1 through 3 for each Garage Module in your system.
Using X10 Modules with GarageHawk
If you wish to enable GarageHawk's Temporary Path Lighting feature using X10 Lighting or Appliance Modules.
Set X10 module(s) to House Code "G", Unit Code "16"
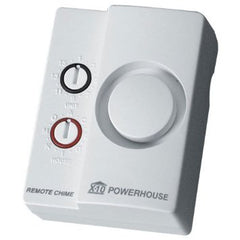
If you wish to announce a garage door opening with an X10 Chime Module
Set X10 Chime Module(s) to House Code "G", Unit Code "16"
Linking Options For Your Home
Additional Remote Modules can be added to accommodate your needs
Additional Garage Modules can be added to accommodate your needs
Additional Garage Modules and/or Remote Modules can be added to accommodate your needs


